
DIY Easy Outdoor Fire Pit
-
Difficulty:Intermediate
-
Team:1-2
-
Time:Over 6 Hours
Tools
-
Box Saw
-
Pencil
-
Ruler
-
Safety Goggles
-
Screw Drivers
-
Tape Measure


Fire Pit Surround
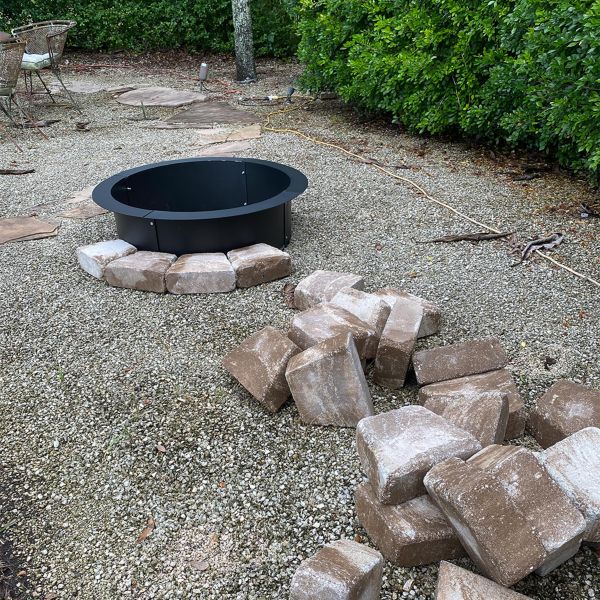
Decide where you want to build your fire pit, keeping the site at least 6’ away from shrubbery or existing structures.
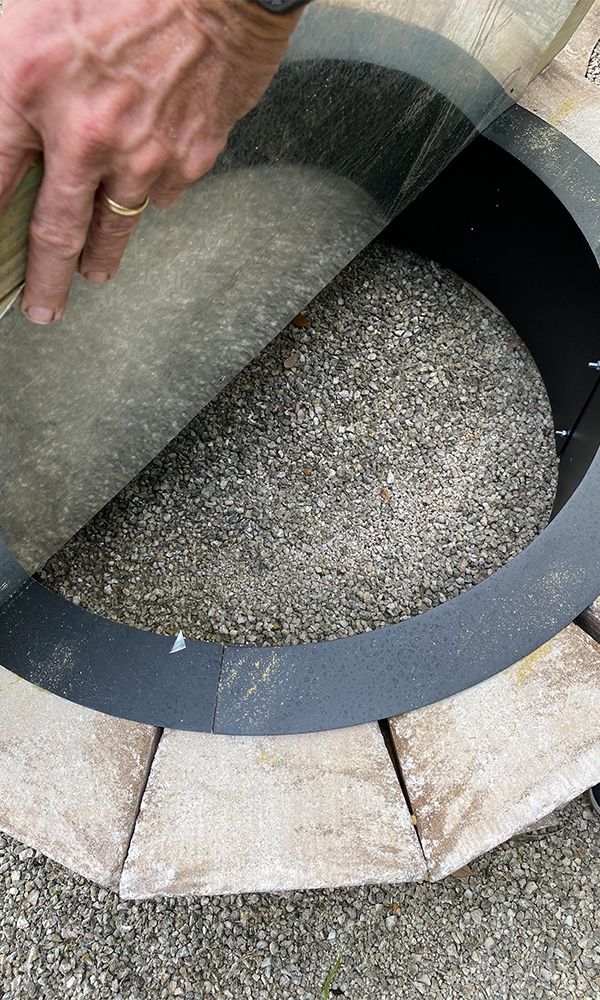
Fire Pit Surround
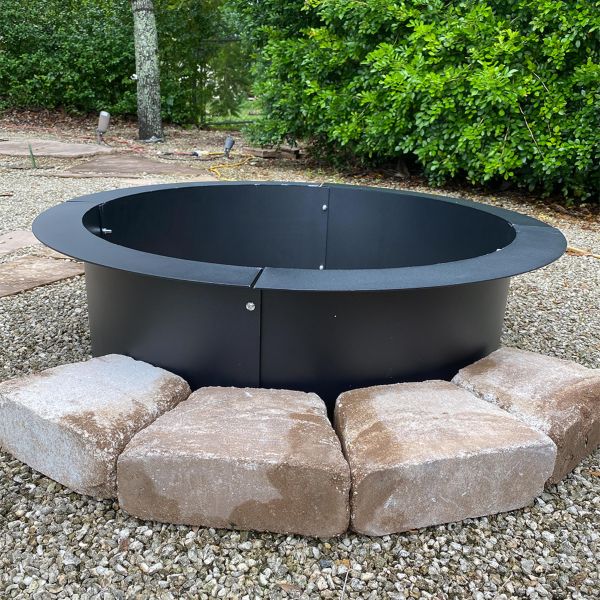
Assemble the metal insert with a screwdriver and an open-end wrench.
Fire Pit Surround
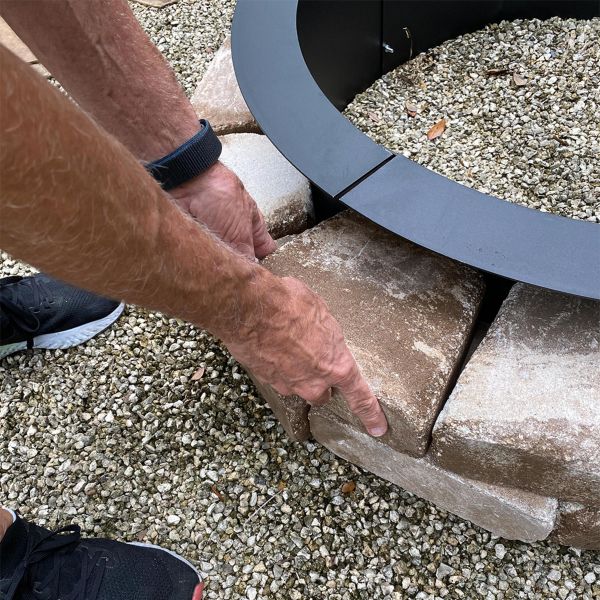
Place the brick completely around the perimeter of the metal fire insert. Add additional layers one at a time to be 3 layers tall or more once finished stacking.
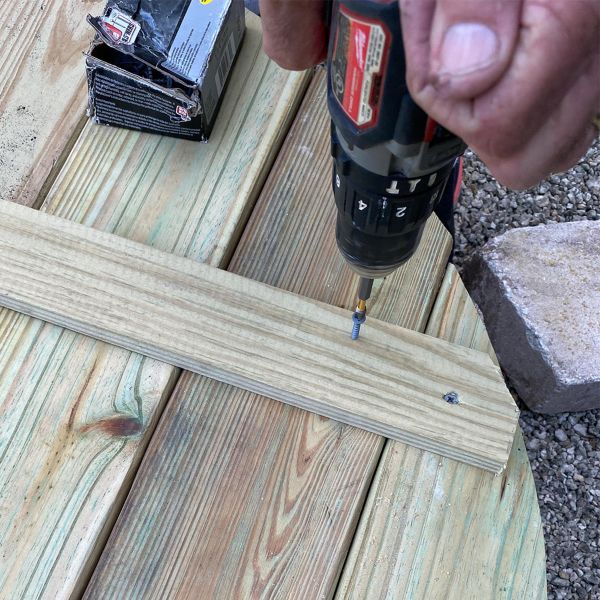
Fire Pit Cover
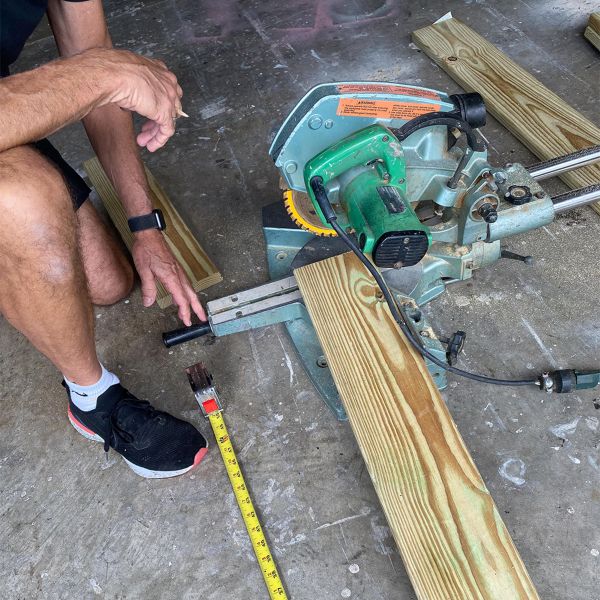
Using a chop saw, cut each of the four 8′- 2 x 6’s in half to make eight pieces, measuring 4′ long each. Cut the 8′ – 1 x 3’s into four pieces that will then be 2′ in length.
Fire Pit Cover
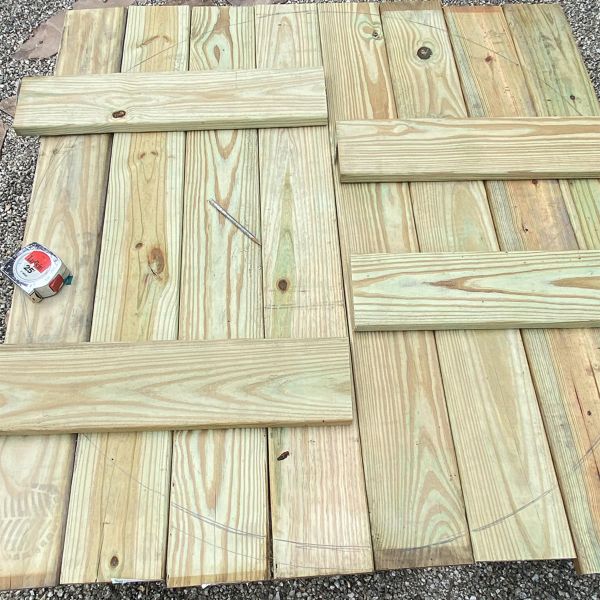
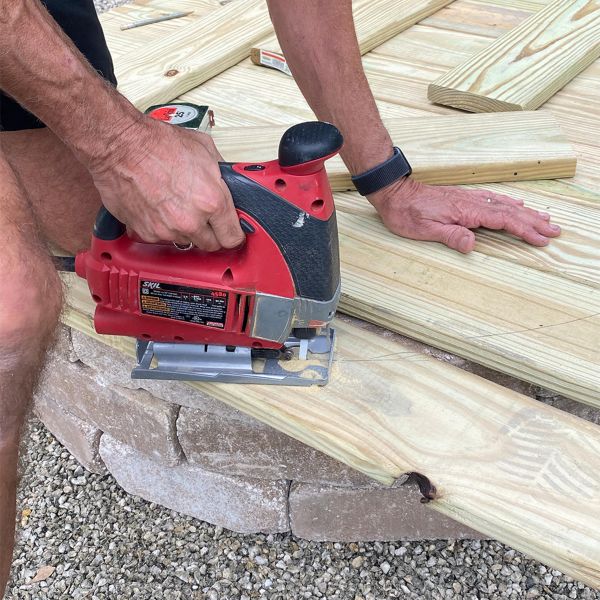
Place the eight 4’ long boards on top of the fire pit, completely covering the top. Place the four 1 x 3’s on top to determine their final length. They will need to be trimmed with the jigsaw.
Fire Pit Cover
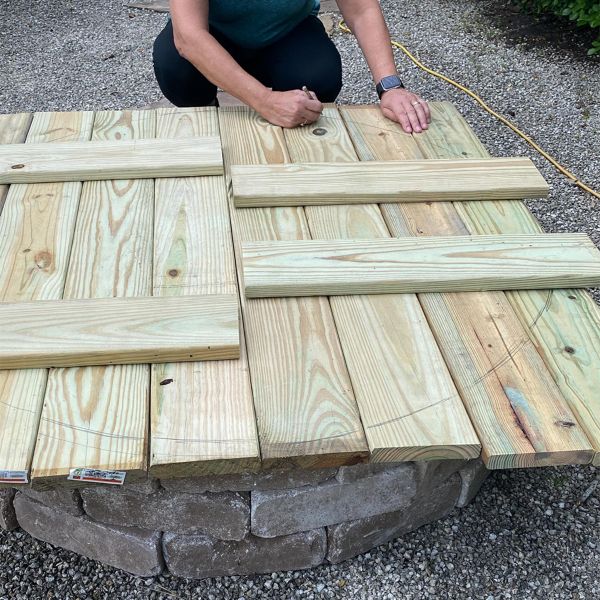
Locate the center of the wood pieces that you’ve now placed on top of the fire pit using your measuring tape. Take a short length of string and draw a radius with a pencil around the edge to round off the wood for the top.
Fire Pit Cover
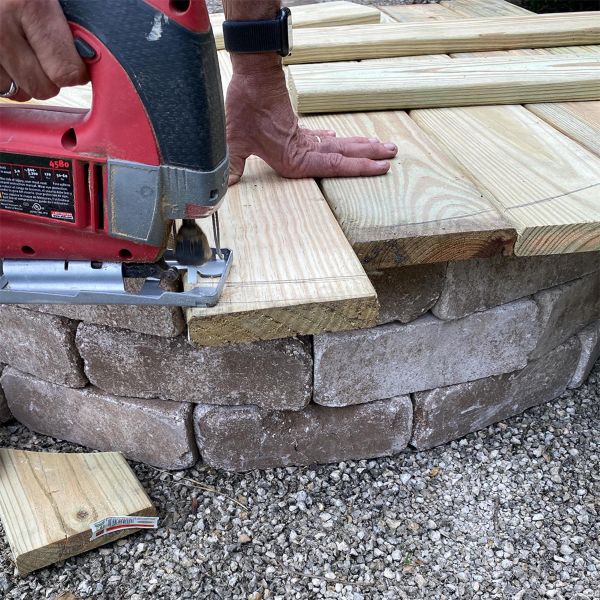
Use a jigsaw to cut around the radius of the wood that you’ve marked around the edge of the fire pit. Then trim the 1 x 3’s to match the edge.

Fire Pit Cover
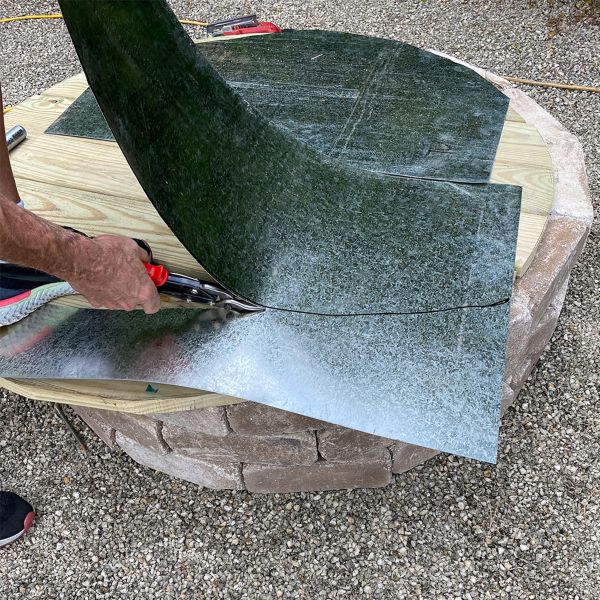
Measure the metal sheeting and mark with a marker to match the radius of the top. Cut the metal sheet with snips in two parts so that you’ll be able to fold the top once hinged. The metal sheet will need to cover the inside of the fire pit only. Attach with 1 ¼” exterior deck screws.
Fire Pit Cover
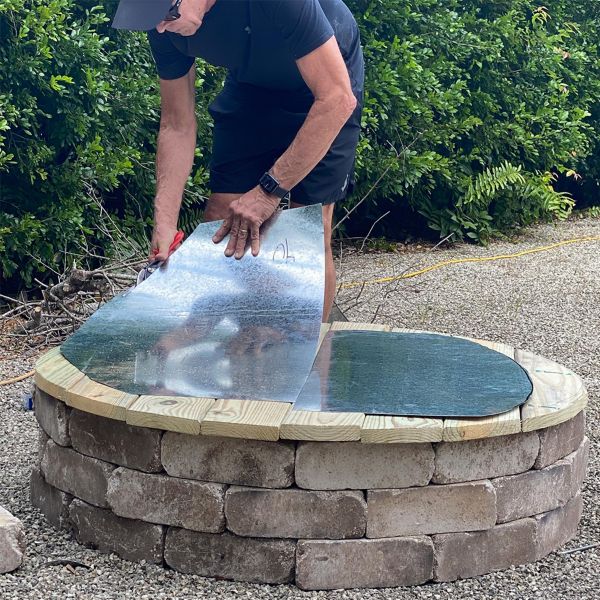
Once you’ve attached the metal to the underside of the top, flip it over. Attach the four 1 x 3’s to the 2 x 6’s with 1 1/4″ deck screws. Be sure to offset the 1 x 3″s. The top will be hinged so you don’t want the wood to overlap!
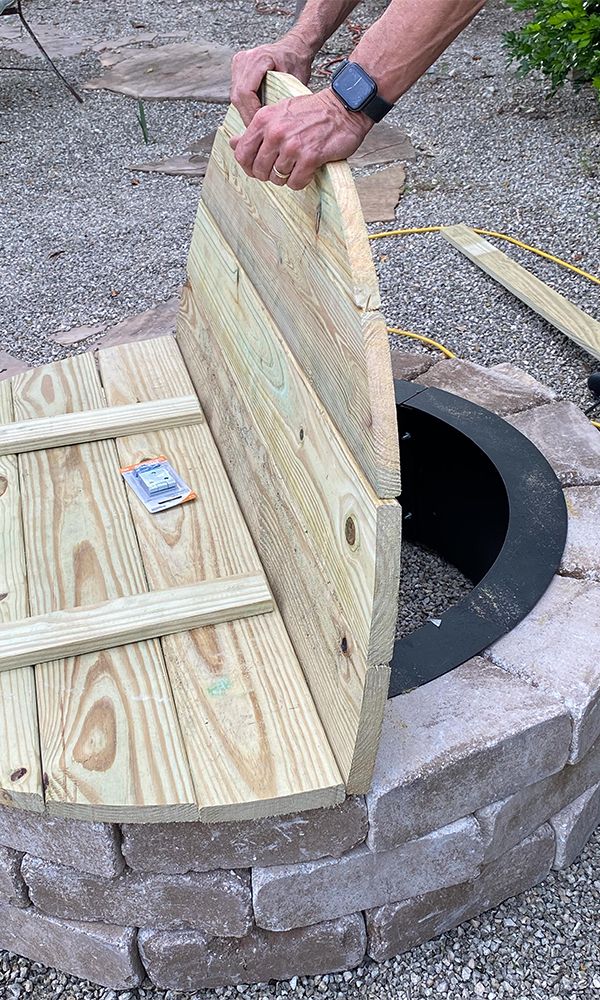
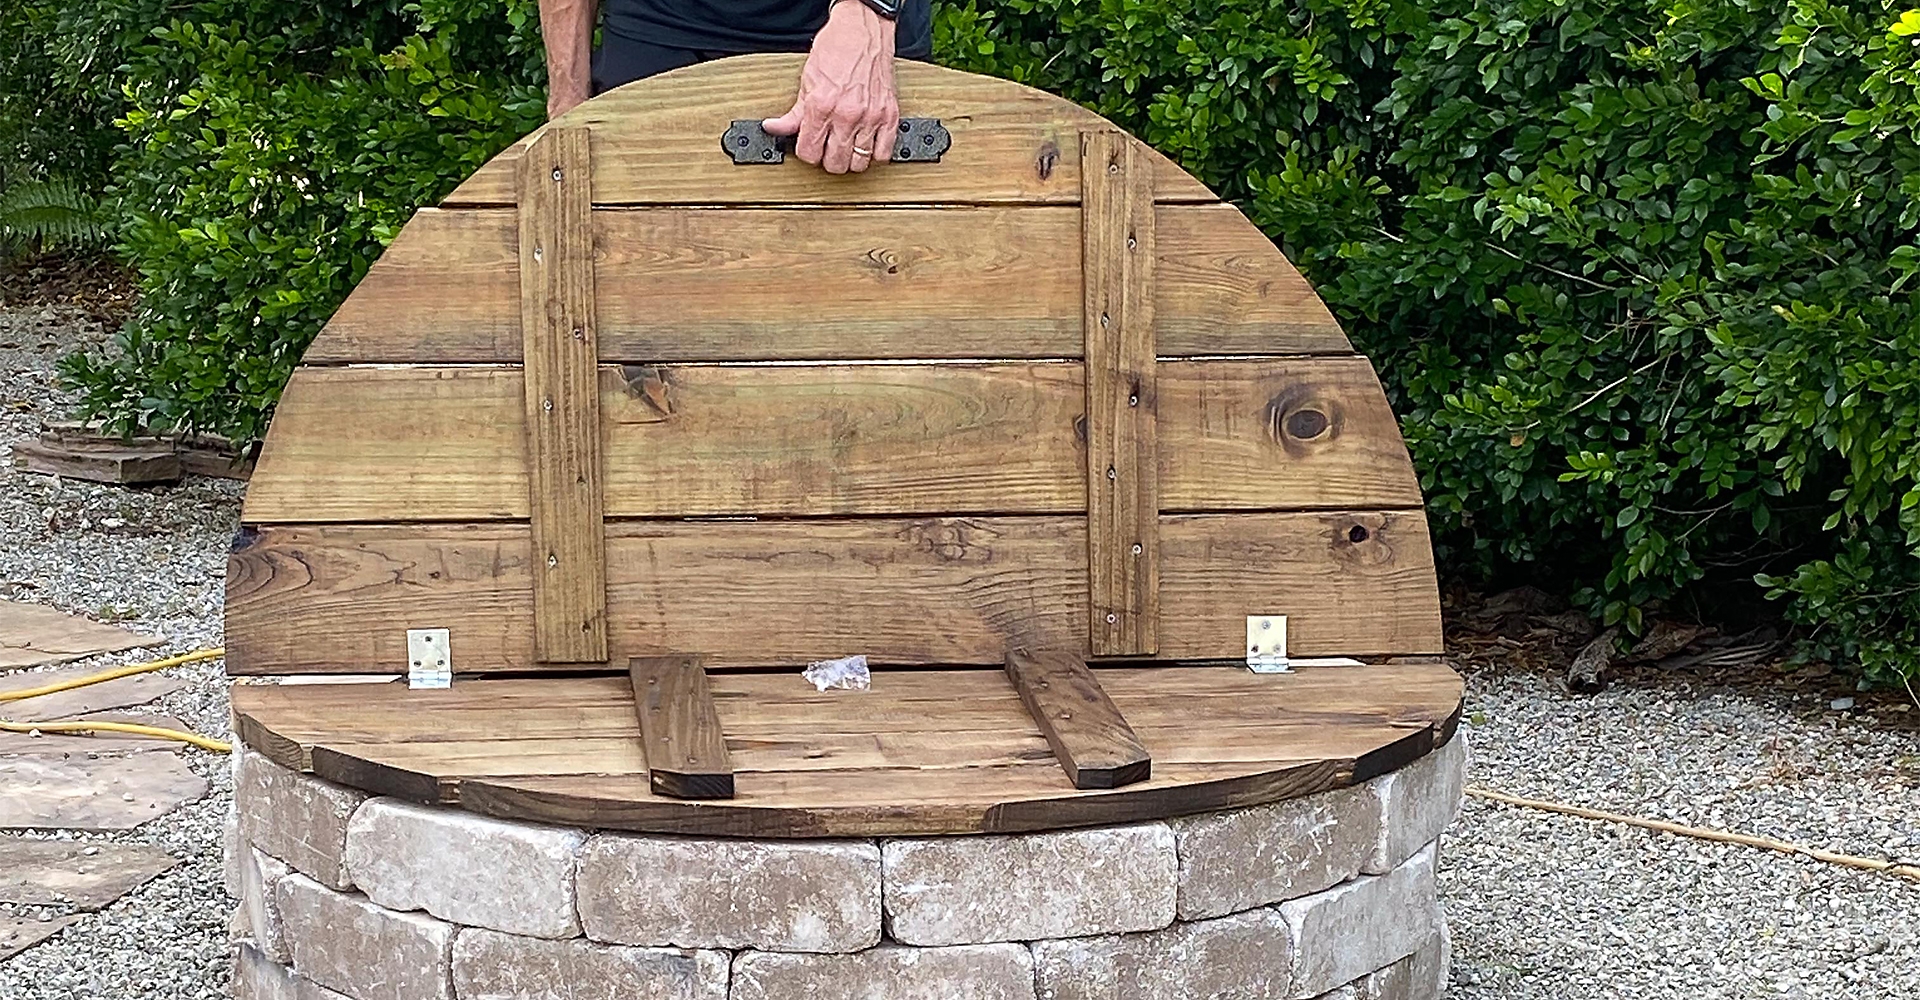
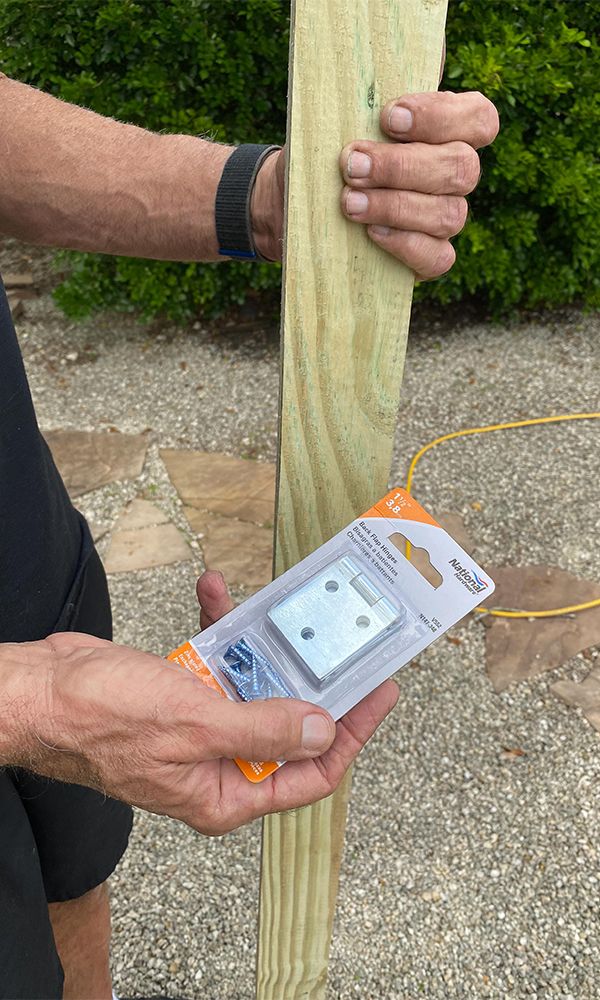
Fire Pit Cover
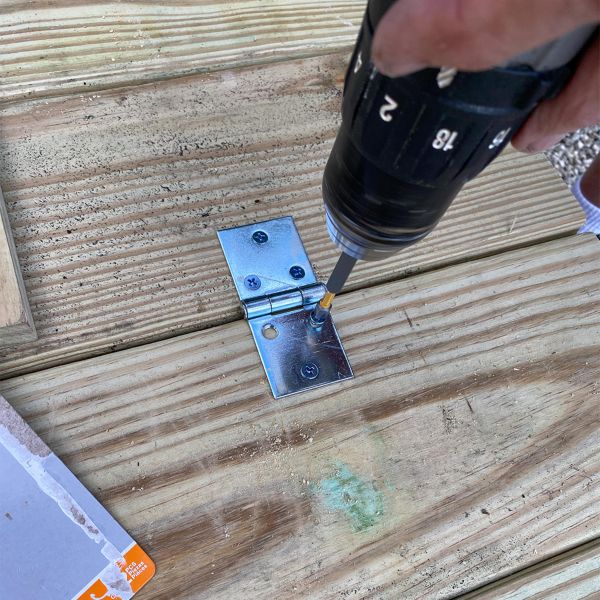
Attach the National Hardware Back Flap Hinges to the top center. You’ll be able to open the outdoor fire pit cover without removing it! Now is the time to add stain or paint, if desired.
Fire Pit Cover
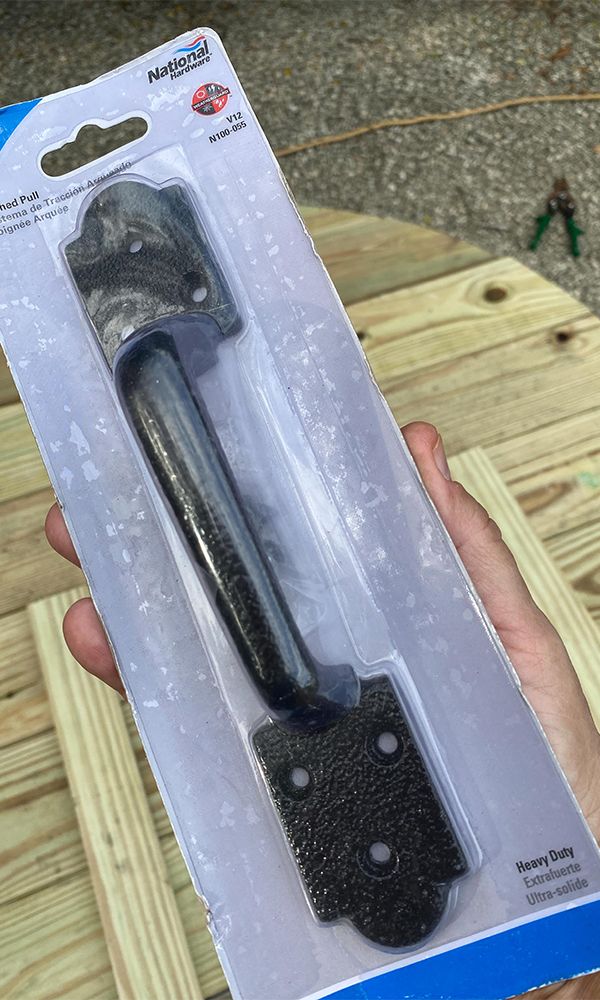
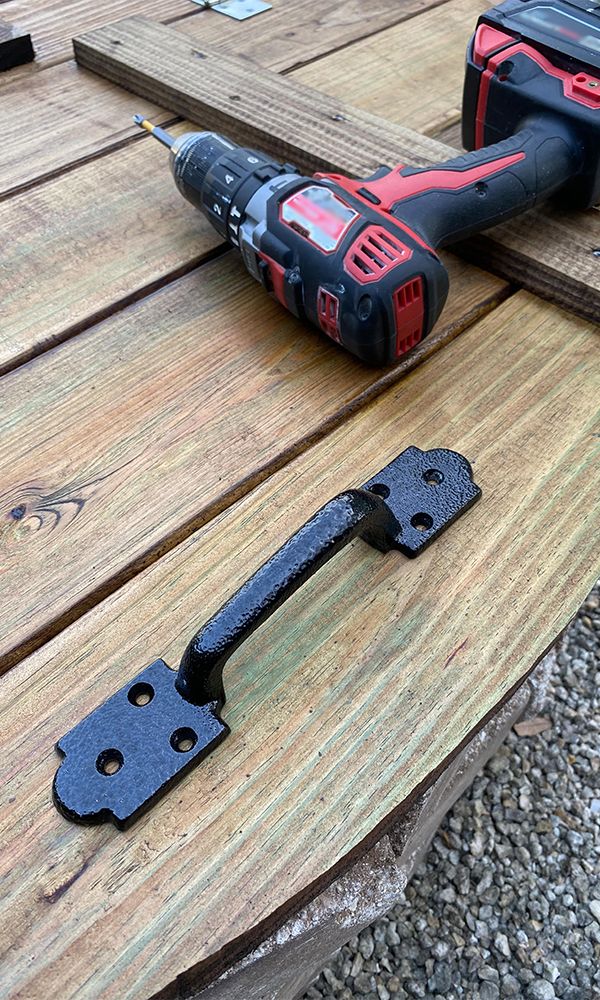
Attach the National Hardware 8 1/2″ Arched Pull to one side of the top or use two pulls if you prefer a symmetrical appearance. With the lid being hinged, the National Hardware Pull makes it easy to move open or lift up the top!
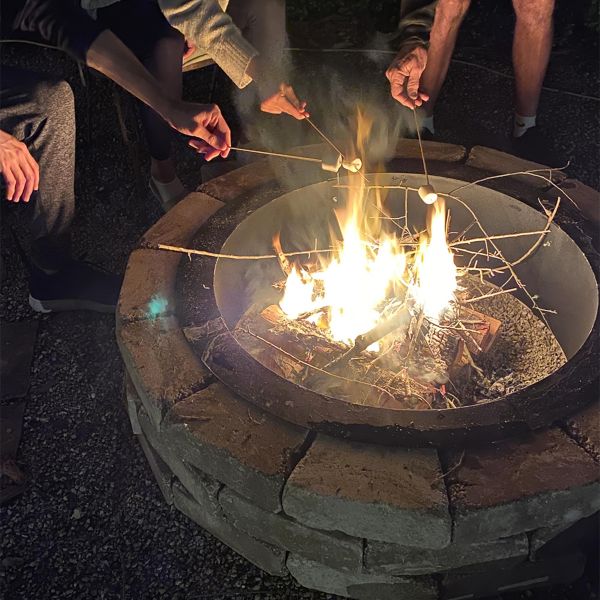
This project will last for years and the lid will keep the fire pit protected from the elements. Enjoy, and always take precautions when making a fire outdoors!

Hardware
- Related Product Categories:
- Specialty Hinges
- Hinges
- Gate Parts & Accessories
- Gate Hardware