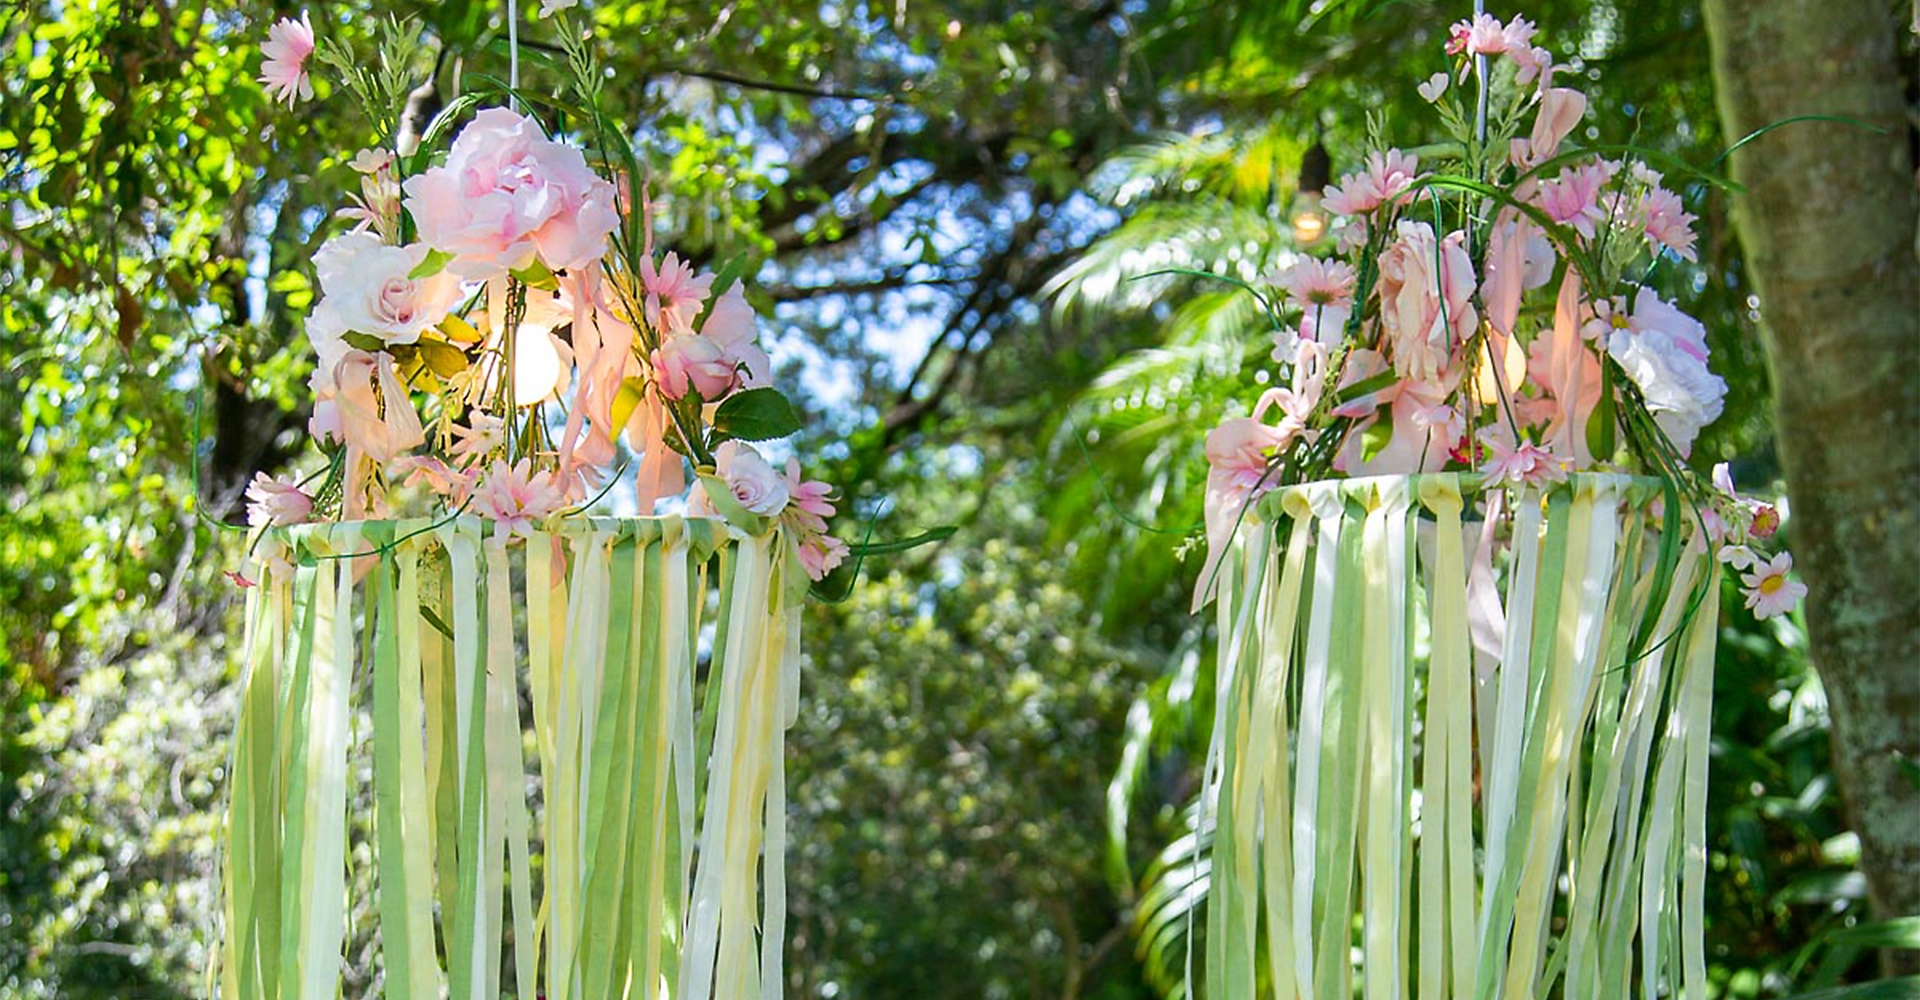

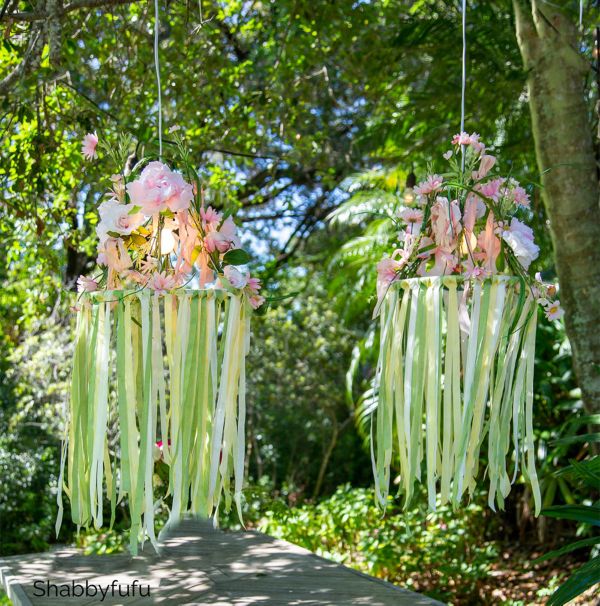
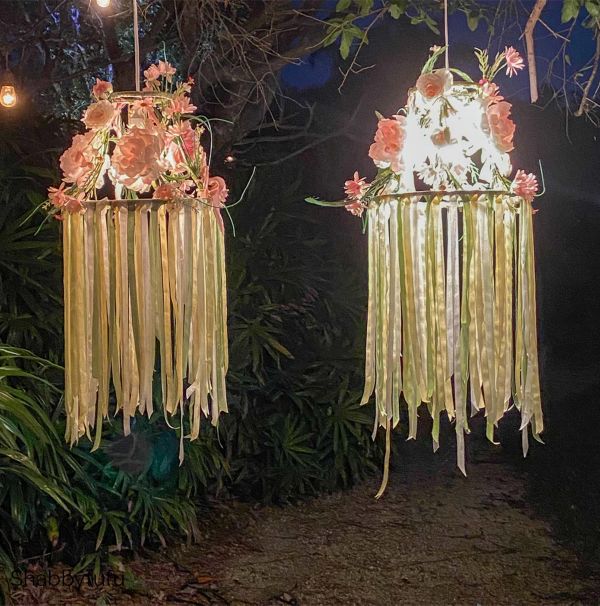
DIY Floral Chandelier from a Lampshade
Learn how easy it is to make a floral chandelier by using a lampshade as the base! With a handful of fake flowers and ribbon, make your outdoor spring or summer party beautiful!
-
Difficulty:Beginner
-
Team:1
-
Time:2 to 4 Hours
Tools
-
Safety Goggles
-
Screw Drivers


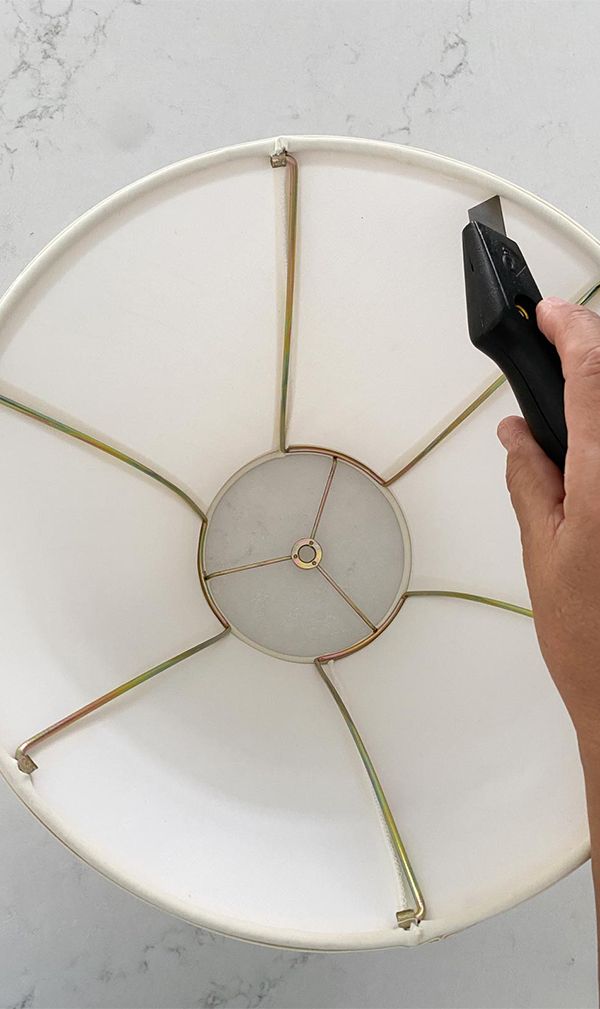
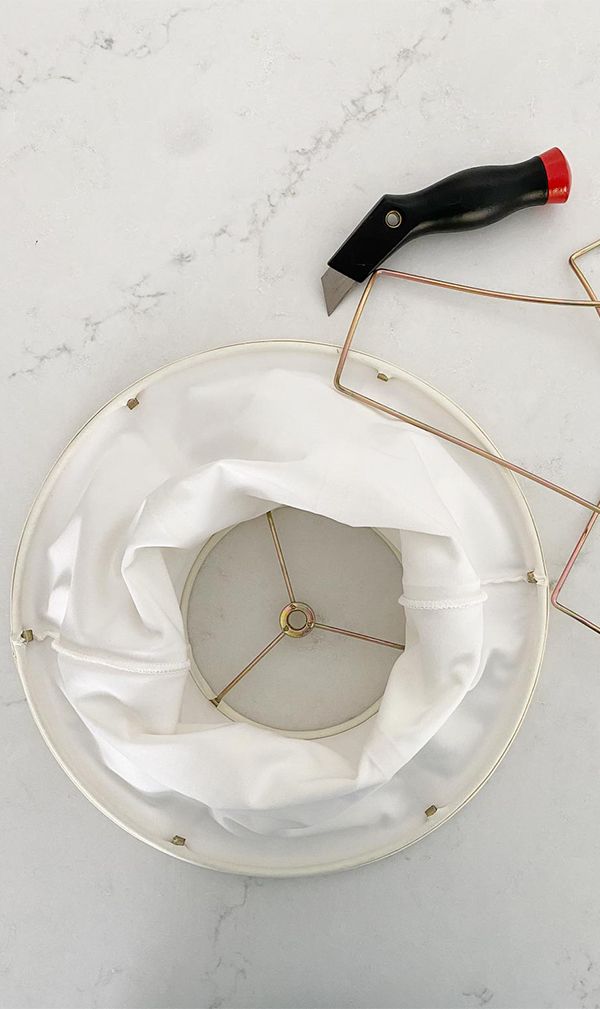
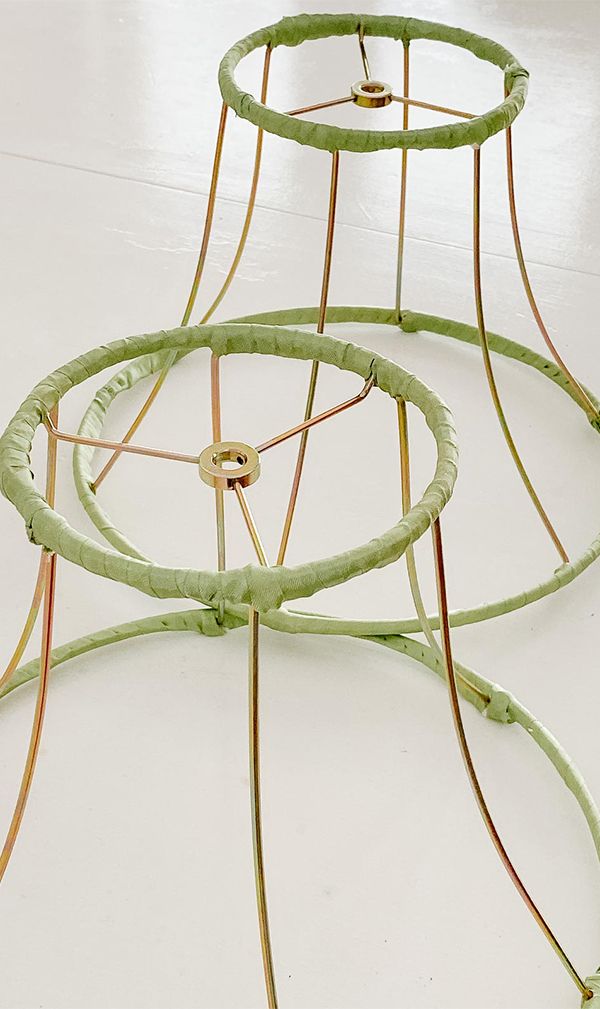
Remove Fabric
Remove the fabric from your lampshade frame by cutting it off with a utility knife. Leave the fabric trim that cover the top and bottom rings of the lampshade. They keep the shade form intact while you work on this project.
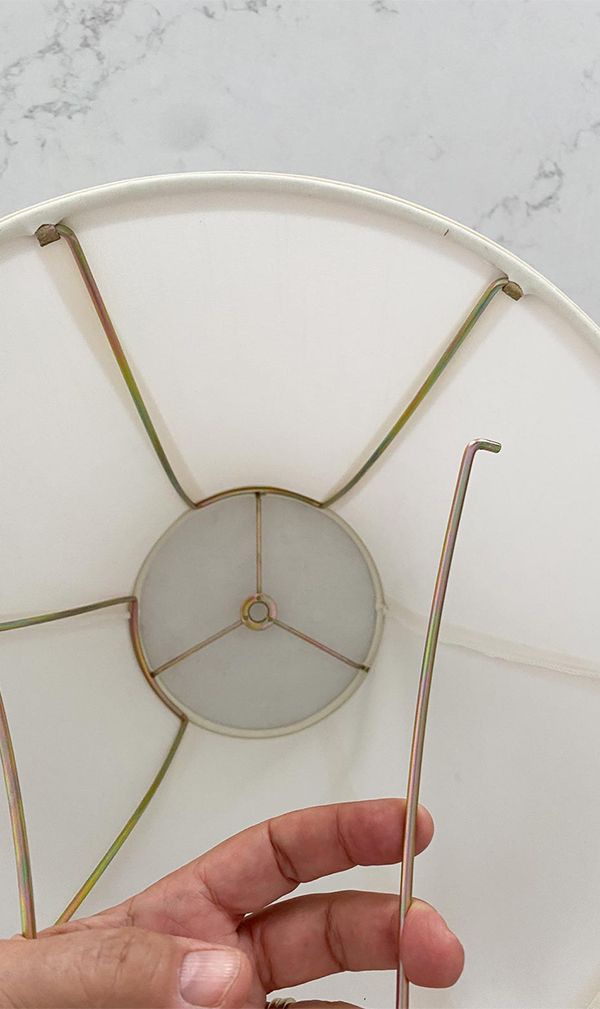
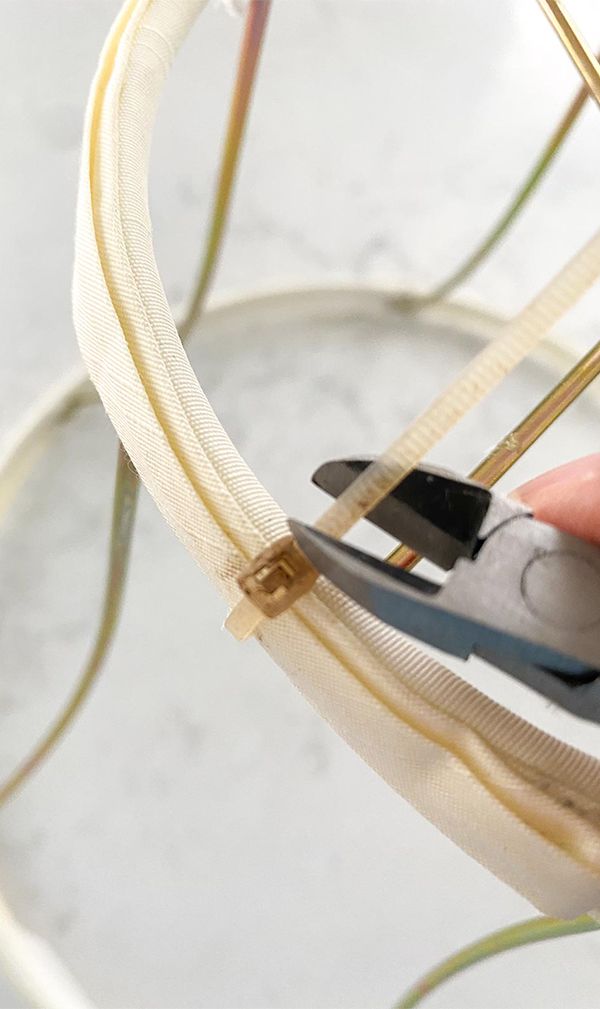
Twist
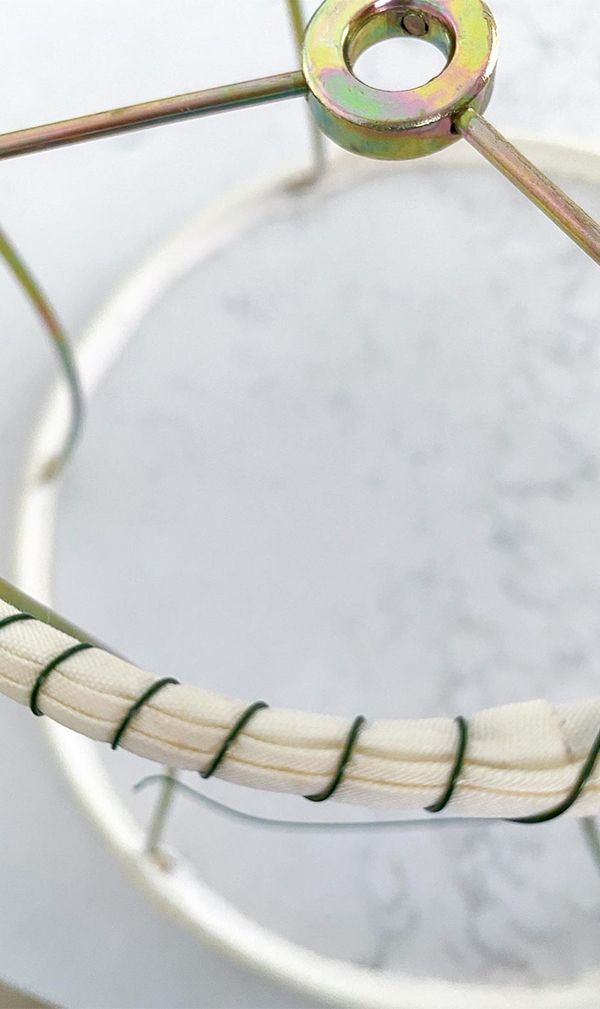
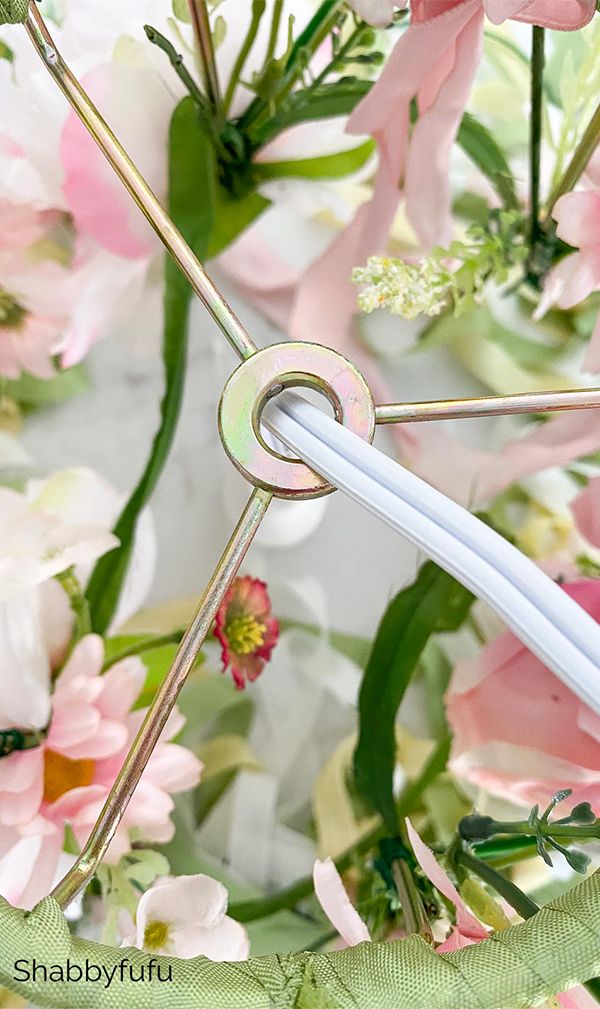
If using a collapsible shade, reassemble the shade by putting the wire inserts (as shown) back in place. To temporarily hold the metal flanges in place, we used plastic twist ties. Skip this step if using vintage lampshades or new shades that aren't collapsible. Once the shades are assembled, wrap the National Hardware Floral Wire around as shown to hold the important trim permanently in place. If you've used twist ties to help keep the structure, you can now cut them off! National Hardware's Wire is designed for crafts, art projects, and various home projects and is strong!
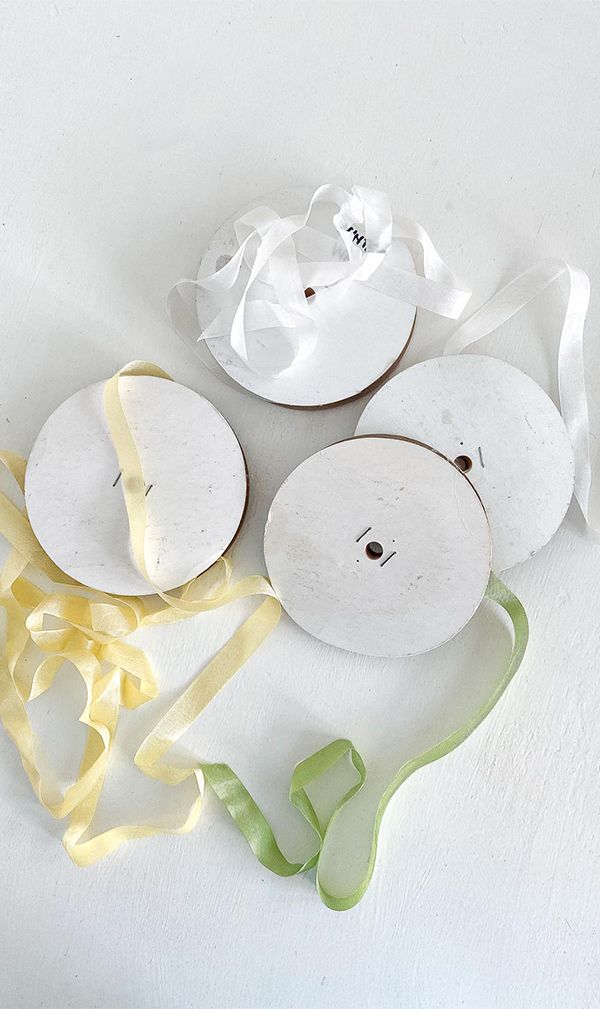
Wrap
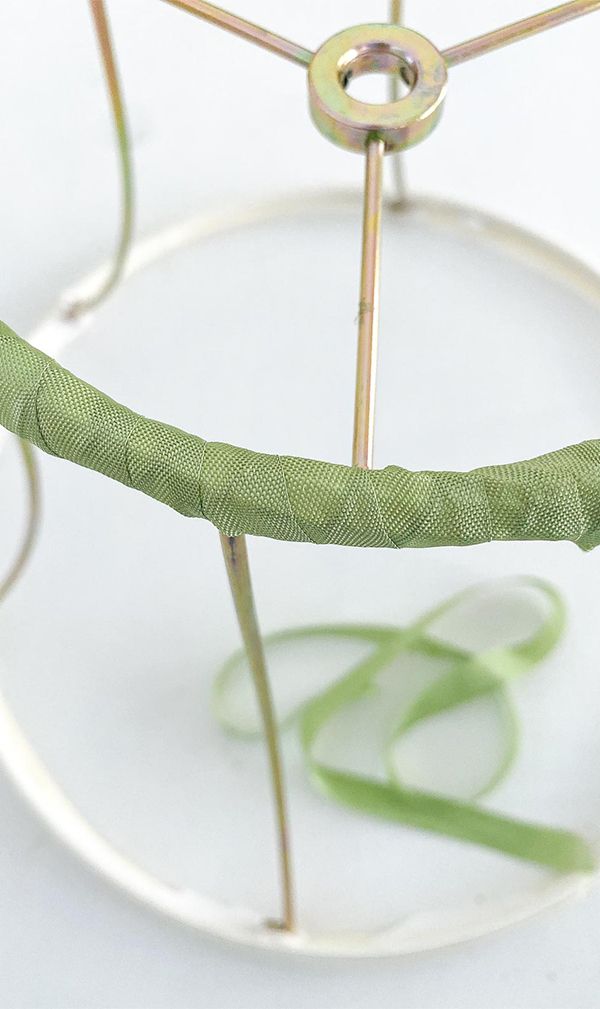
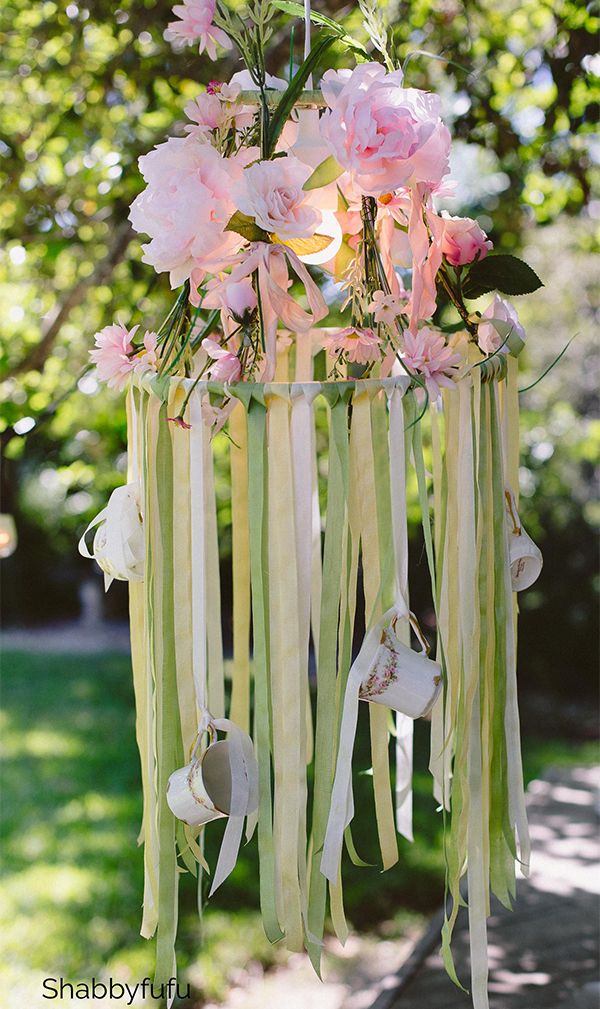
Wrap decorative ribbon around the top and bottom rings of the lampshade. Be sure to overlap and cover all of the fabric trim, pulling it tight. You could also cover the metal ribs of the shade if they are unattractive or you don't want them to show.
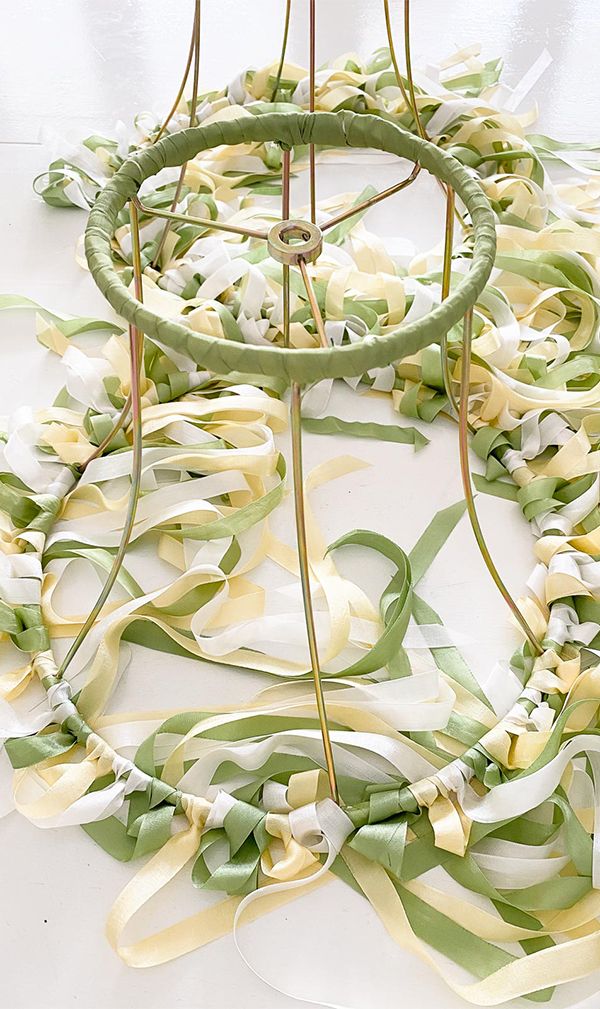
Add Ribbon
Once the rings are wrapped and hidden, it’s time to add more of the ribbon to create streamers on the bottom ring. Cut each piece of ribbon to measure about 36" long. You'll be cutting lots of ribbons, so be sure that you have plenty available. This is the most time-consuming part of the project!
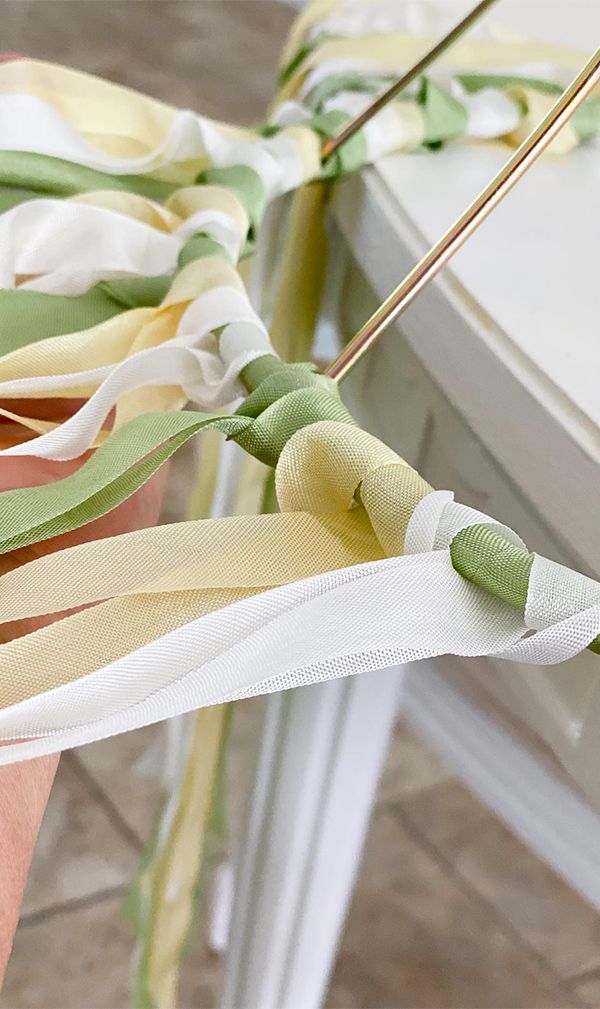
Attach
To attach, fold each strand of ribbon in half and make a loop. Pull the ribbon through the loop as shown. Once you’ve filled up the entire bottom ring with this cascading ribbon you’re ready to add the faux flowers!
Cut
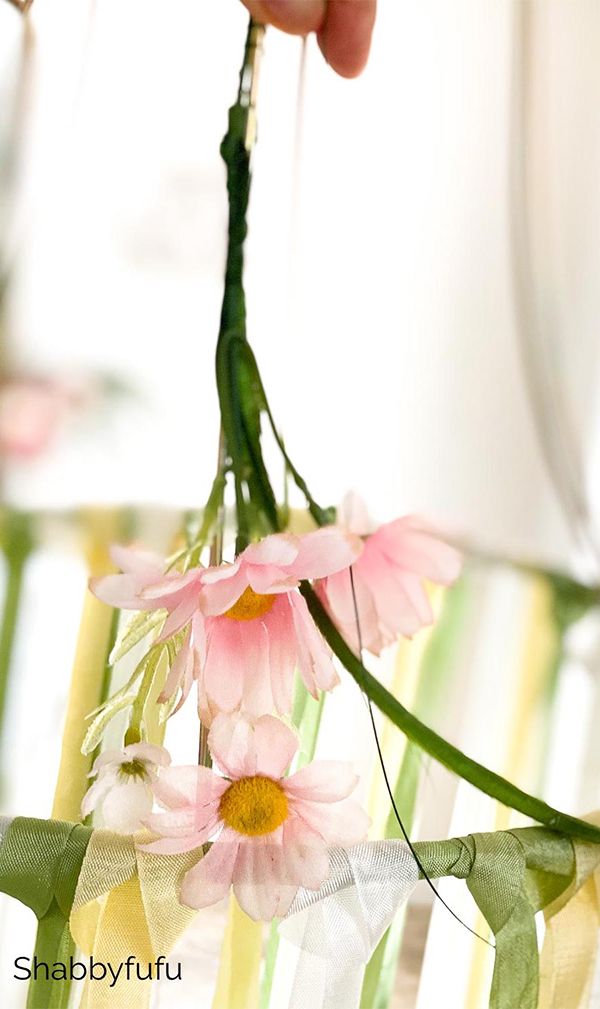
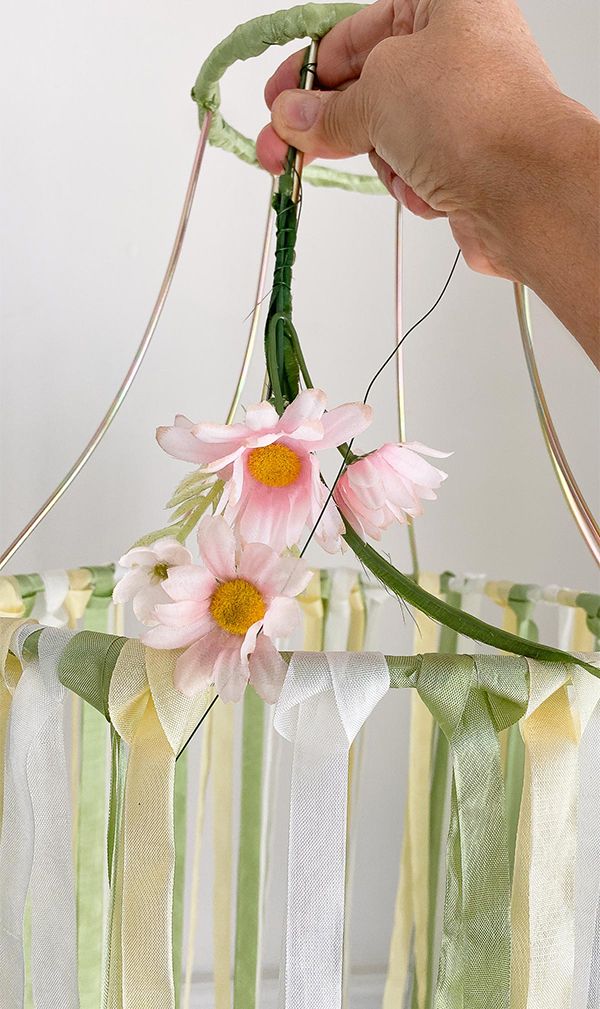
Now you’ll add the flowers to your diy floral chandelier (the fun part!). Use wire snips to cut your flower bunches apart. You’ll also use wire snips to remove any portion of the flowers that you don't want to use or attached greenery.
Cut
Cut pieces of the National Hardware Floral Wire to 6-8" each in length to wrap your flower pieces and hold in place. For a more artistic look, add in some stems and greenery. Keep in mind that you'll be looking at this from the bottom up slightly, as you would with any chandelier! Keep adding flowers until you feel the ribs of the shade have enough coverage to suit. Larger flowers may need a dab of hot glue to hold them in place.
Hang It!
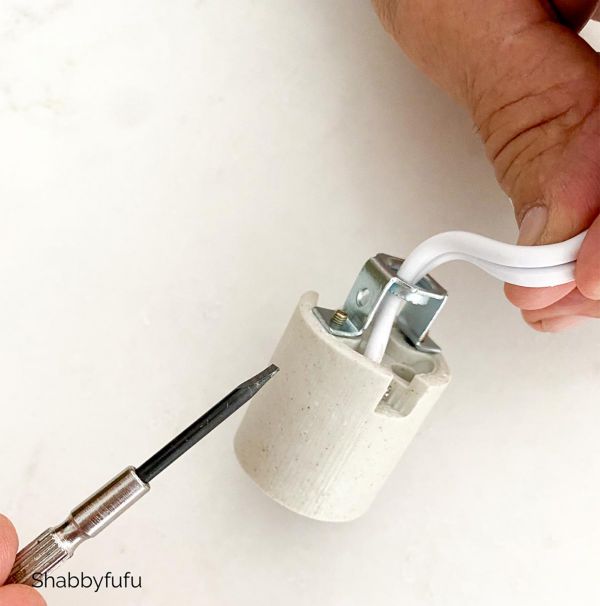
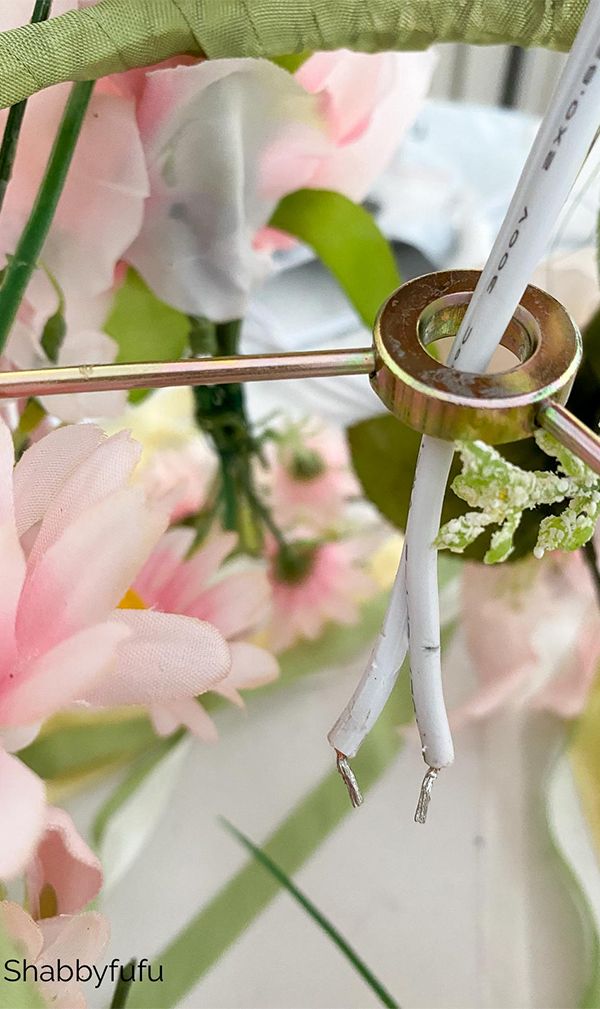
Once you are finished with the floral chandelier you’ll need a way to hang it! First decide if you want to electrify it or just hang it as a decorative object. To hang without a bulb, wrap some cording or rope around the center hole. Then wrap the cording or rope around tree branches to hang.
If using a hanging pendant lamp cord and socket set, you will most likely need to remove the socket first in order to slip the wire through the frame.
Hardware
- Related Product Categories:
- Picture Hanging Wire
- Picture Hanging Hardware